Tag: water colors

Coconut Trees at Twilight

No Comments

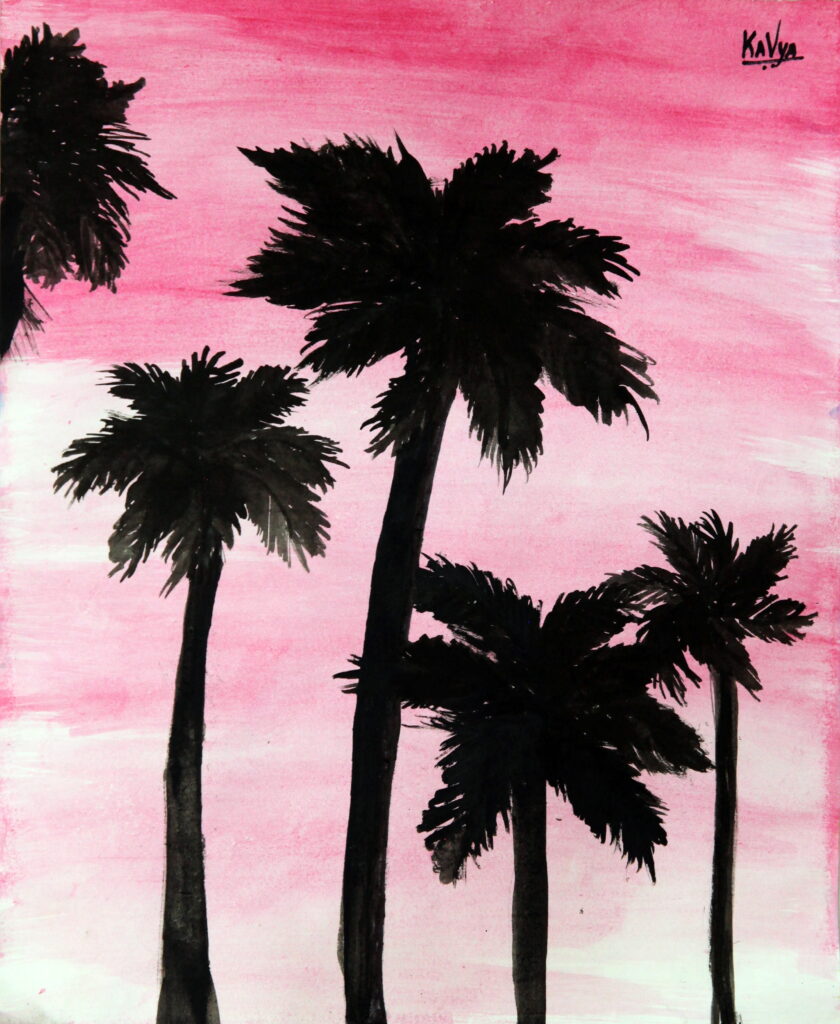
This a silhouette painting. I did this in water colors. For this painting you don’t need to draw anything. So I first started of with the background. I used graded wash method to do the background.

How to do graded wash?

Graded wash is a method when you take one base color and paint it at the top. Then you take some clear water and just paint horizontally from top to bottom. You are actually taking some of the paint from the top and while coming to the bottom the paint gets lighter and lighter.

After finishing the background you can do the coconut trees in black and that’s it. I like this painting because it is very simple yet beautiful.

Underwater weeds

No Comments

I did this painting in watercolors. You don’t need to draw anything for this painting, you can straight away start with the background. For the background I used Teal (bluish green). In the middle of the page I made the color lighter and around it is done with darker shade of Teal. After finishing the background I used different shades of green like; Light green, Sap green, Leaf green(Dark green+ Light Green) and dark Green. I painted tall plants as tall to that reach the top of the page in all the colors of green. After it had dried, I used saffron (to make the painting brighter) to paint the fishes. You can paint about 5-6 fishes And finally, you put a small dot for the eyes of the fishes. I like this Painting because the overlapping of the weeds look very nice.

Juicy Watermelon

No Comments

This is a picture of a watermelon. I used water colors for this paining. To start with draw the water melon and the cut watermelon in the correct angle. Try to make one of the cut watermelon as someone has bit it. Then it is time to paint. Take your water colors and first finish the full watermelon by giving Dark green and Light green stripes. Then you come to the cut watermelon. You paint the white and green part of the cut watermelon first, then you do the juicy part of the watermelon. Give the behind lighter shade and give the front cut watermelon a darker shade of red. Then you paint the seed of the watermelon in black. As the background is just plain paper. I used graded wash method. It is a method where the upper part is darker and slowly when you come down it becomes lighter. So I used graded wash method to make as if watermelon juice is coming out. The best part that I liked about this picture is the juice coming out of the watermelon. It gives a very nice final touch to the painting.

Forest Cottage

No Comments

This is a scenery of Lake side view cottage in the middle of a thick forest. I used water colors for this painting. First we have to finish the lighter trees which are in blue and are lighter than the nearer tree as the color of the trees fade away when we see it in a distance. Then we come to all the green parts. To separate different bushes and trees I used different shades of green. After finishing the green parts I came to the lake. I used blue water color for the lake. To make the lighter areas of the lake just add more water. But not too much as the paper will tear. Then you can do minute strokes with a thin, dry brush for grass. Then at the last you can do the little cottage with the color of your choice. But don’t make it too bright as it won’t make it look like an old cottage. I love this Painting because it has greenery and looks very beautiful.

Pink Flamingo

No Comments

This is a flamingo. The only colors you need is Red, White, Grey and Black. I did this in water colors. After drawing the picture you start with the body of the flamingo. Then you mix red and a little bit of black to make a darker shade of red. The make feather like impressions on the tip of the body then you put grey for the legs and Black for the eyes and the beak. For the background I used an old toothbrush and sprayed pink paint for the background. I really like the idea for the background as it goes very well with picture.

Cherry Blossoms

No Comments

These are Cherry blossoms. This is done by water colors. The paints that I used was just Red and Brown. After drawing the picture you have to put some red water color in the middle of the flower and smudge it around with water and while you smudge it, you will observe that in the middle its a darker color and while you go to the tip of the petal, the shades become lighter and lighter and you don’t need to cover the whole petal with paint you can leave some areas plain. And at last you add brown for the stalks. And that’s it. I like this painting because it’s very simple and beautiful.

Flowers

No Comments

This form of art is called Stippling. I did this in water colors. To make the flowers I used the stippling method. I use a thin brush and dip it in a diluted water color paint. And make very tiny strokes like I did in the picture. You can use different colors to make flowers.